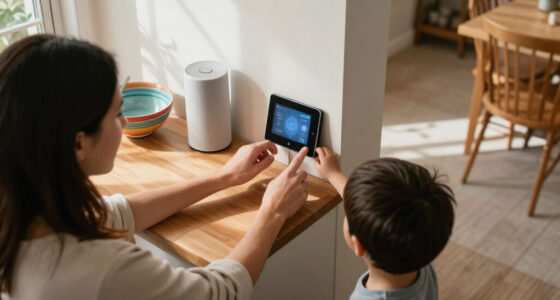

Set up a family smart home by choosing compatible devices, connecting them to your home network, and testing controls with the people who will use them. This guide is for households new to smart devices or adding their first shared setup. Plan for about 1-2 hours, plus extra time if devices need software updates or your Wi-Fi needs attention.

Turn the school run and nap time into listening time
- Thousands of audiobooks, podcasts and originals
- Listen on your phone, tablet or Echo — also offline
- Cancel anytime

Amazon Echo Show 15 (2nd Gen) 15.6-Inch Full HD Smart Display with Fire TV
- ✔ Display: 15.6-inch Full HD, 1920 × 1080
- ✔ Dimensions: 16.1 × 10.1 × 1.4 inches
- ✔ Weight: 4.96 lb

Amazon Echo Show 11 Smart Display, Full HD, Graphite
- ✔ Display: 10.95-inch Full HD touchscreen, 1920 × 1200
- ✔ Dimensions: 10 × 5 × 7.2 inches
- ✔ Weight: 45.92 oz (1302 g)

Amazon Echo Show 5 Smart Display, Cloud Blue
- ✔ Display: 5.5-inch touchscreen
- ✔ Dimensions: 5.8 × 3.6 × 3.2 inches
- ✔ Weight: 16.1 oz (456 g)
Difficulty: Beginner | Time: 1-2 hours
What You’ll Need
Tools & Materials:
- A smartphone or tablet with the device maker’s app installed
- A stable home Wi-Fi connection and its network password
- Smart devices and any required hub, power supply, or mounting hardware
- Access to the household’s Wi-Fi router settings, if needed
Knowledge:
- Basic ability to install an app and follow its setup prompts
- Know which family members should have access to each device
- Know the home Wi-Fi name and password
Check device packaging or the maker’s website for supported Wi-Fi bands, hub requirements, and phone compatibility. Some devices only connect to a 2.4 GHz Wi-Fi network. Choose a main household account controlled by an adult, and use unique passwords. Keep cameras and other devices with microphones out of private spaces unless everyone affected agrees to their use.
Amazon Echo Show 15 (2nd Gen) 15.6-Inch Full HD Smart Display with Fire TV
The Echo Show 15 is the strongest fit when a family wants one prominent place for household information, calls, entertainment, and smart home controls. Its 15.6-inch Full HD display gives widgets and video room to be seen across a kitchen or shared space, and its landscape or portrait orientation lets households adapt the setup to the wall or counter. Compared with the Show 11, the extra screen area and built-in Fire TV make this the more natural choice for a combined family dashboard and entertainment screen.Its 13 MP camera adds auto-framing, zoom, and noise reduction for video calls, while a physical shutter and microphone/camera-off button give families direct privacy controls. The built-in hub supports Zigbee, Matter, and Thread, which can simplify control of compatible devices. The tradeoff is its size: at nearly five pounds and over 16 inches wide, it needs a deliberate place to live. It also requires Wi-Fi for setup, and some streaming services or skills may require subscriptions or fees. Compared with the Show 5, it offers far more for shared use, but is a poor fit when counter space or a compact bedside screen matters most.
Pros:
- Large Full HD screen supports shared viewing of widgets and entertainment.
- Fire TV, customizable widgets, video calls, and smart home controls combine in one device.
- Built-in hub supports Zigbee, Matter, and Thread.
- Includes wall-mount hardware and provides camera and microphone privacy controls.
Cons:
- Its large, heavy design requires a suitable location and mounting space.
- Wi-Fi is required for setup.
- Some skills and streaming services may require subscriptions or other fees.
Best for: Families who want a wall-mounted kitchen or common-room dashboard that combines household widgets, calls, streaming, and compatible smart home controls.
Not ideal for: Households short on wall or counter space, or anyone seeking a small display for a bedroom or desk.
Bottom line: For families seeking a visible, all-in-one household hub, the Echo Show 15 offers the most complete shared-space setup in this group, provided its size suits the room.
“For families seeking a visible, all-in-one household hub, the Echo Show 15 offers the most complete shared-space setup in this group, provided its size suits the room.”
Amazon Echo Show 11 Smart Display, Full HD, Graphite
The Echo Show 11 occupies the middle ground: a 10.95-inch Full HD screen offers more room for family viewing than the Show 5, without requiring the broad wall space of the Show 15. Its 13 MP auto-framing camera is also a substantial step up from the smaller model’s 2 MP camera for households that make video calls. With a built-in hub for Zigbee, Matter, and Thread, it can serve as a capable smart home control point for compatible devices.Families who prioritize calls and a room-friendly screen may prefer it to the Show 15, especially if they do not need the largest display or the Show 15’s built-in Fire TV. It also offers spatial audio and sensors for ambient temperature, light, and presence, adding household context to its Alexa features. The available product details do not identify a stand-alone Fire TV feature for this model, so families choosing primarily for integrated streaming should compare it carefully with the Show 15. It remains considerably larger than the Show 5, and its 45.92-ounce weight makes it a fixed-room device rather than a highly portable screen. Bluetooth speakers requiring PIN codes are not supported.
Pros:
- 10.95-inch Full HD screen balances shared viewing and room footprint.
- 13 MP auto-framing camera supports family video calls.
- Built-in Zigbee, Matter, and Thread hub controls compatible devices.
- Spatial audio and ambient sensors add household-focused capabilities.
Cons:
- Still larger and heavier than a compact bedside display.
- Bluetooth speakers requiring PIN codes are unsupported.
- Does not match the Show 15’s 15.6-inch viewing area.
Best for: Families who want a roomy Full HD screen, stronger video-call camera, and smart home hub for a living area without choosing the largest display.
Not ideal for: Buyers who need the smallest possible device, or who specifically want the Show 15’s large dashboard and built-in Fire TV combination.
Bottom line: The Echo Show 11 is the balanced choice for families who want a capable shared display and smart home hub while keeping clear of the Show 15’s larger footprint.
“The Echo Show 11 is the balanced choice for families who want a capable shared display and smart home hub while keeping clear of the Show 15’s larger footprint.”
Amazon Echo Show 5 Smart Display, Cloud Blue
The Echo Show 5 earns its place by fitting where the other two displays would feel oversized. Its 5.5-inch touchscreen can show weather, photos, news, and video in a bedroom or on a desk, while the built-in camera enables video calls and viewing of compatible cameras. A shutter and microphone/camera-off button provide straightforward privacy controls. Compared with the Echo Show 11 and Show 15, it takes up far less space and is easier to assign to an individual room.That compactness comes with meaningful limits for family-wide use. The 2 MP camera is less capable on paper than the 13 MP auto-framing cameras in both larger models, and the supplied details do not list a built-in Zigbee, Matter, or Thread hub. Its small screen is best for glanceable, personal tasks, not a shared calendar or a group watching from across the kitchen. The Show 15 is the stronger family command center, and the Show 11 is the better middle ground for calls and smart home control. Recycled materials in the fabric and aluminum are a useful design detail, but the deciding factor is whether a small, room-specific screen meets the household’s needs.
Pros:
- Compact dimensions fit bedside tables and desks.
- Camera supports video calls and compatible camera viewing.
- Camera shutter and microphone/camera-off button offer privacy controls.
- Uses recycled polyester yarn and recycled aluminum.
Cons:
- 5.5-inch screen is less suitable for shared viewing and family organization.
- 2 MP camera lacks the listed auto-framing capabilities of the larger models.
- No built-in Zigbee, Matter, or Thread hub is listed in the supplied specifications.
Best for: Families who want an Alexa display for a nightstand, desk, or compact room, with photo viewing, basic screen tasks, and video calling.
Not ideal for: Households seeking a shared family dashboard, a large entertainment screen, or a display with a listed Zigbee, Matter, and Thread hub.
Bottom line: The Echo Show 5 is the practical pick for a personal room display, but families wanting one central hub should choose the larger Show 11 or Show 15.
“The Echo Show 5 is the practical pick for a personal room display, but families wanting one central hub should choose the larger Show 11 or Show 15.”
As an Amazon Associate we earn from qualifying purchases.
Before You Start
Start with a few devices that solve clear household needs, such as lights, a thermostat, a door sensor, or a speaker. Confirm that they work with the same app or smart home platform before buying. Do not rely on a smart lock, alarm, or connected smoke detector as the only way to secure or monitor your home; keep its standard controls and follow the manufacturer’s safety instructions.
Make a short list of who needs access and what they should be able to control. Use adult-managed accounts for children, and avoid sharing the main account password. If you will install a powered device or drill into a wall, follow its installation instructions and use a qualified installer where required.
Step-by-Step Instructions
Step 1: Choose devices for specific family needs
Write down the task each device should handle, such as turning off a child’s bedroom light or adjusting the living room temperature. Select only devices that support your Wi-Fi, phone, and chosen smart home platform. Check whether setup requires a separate hub, subscription, or cloud account, and review what data the device collects.
Tip: Start with one or two devices. A small setup is easier to troubleshoot and lets the family learn the controls before adding more.
Check: You can explain what each planned device does, which app controls it, and whether it needs extra equipment or a subscription.
Step 2: Set up the household account and network
Install the maker’s official app from your phone’s app store. Create an adult-managed account with a unique password, then turn on multifactor authentication if available. Connect your phone to the home Wi-Fi network that the device will use. If your router offers a separate guest or smart device network, use it only if the device maker supports that setup and your phone can still complete setup.
Tip: Do not put your Wi-Fi password or account recovery codes in a shared family chat. Store them in a secure password manager.
Check: The app opens under the household account, and your phone is connected to the intended home Wi-Fi network.
Step 3: Install and power each device
Place or mount each device according to its instructions, then connect its power or batteries. Keep sensors within their stated range and avoid blocking vents, buttons, lenses, or motion detectors. For mains-powered installation, follow local requirements and the product instructions; stop and use a qualified professional if wiring is involved and you are not trained to do it.
Tip: Leave devices in an accessible position during setup so you can reach reset or pairing buttons without removing a fixture.
Check: Each device powers on, shows its ready or pairing indicator, and is placed where it can perform its intended job.
Step 4: Add devices in the app
In the app, choose the option to add a device and follow its prompts. Scan the setup code or enter the requested details, select the correct Wi-Fi network, and wait for pairing to finish. Give each device a clear name based on its location and purpose, such as “Hallway light” or “Kitchen sensor.” Add it to the matching room if the app supports rooms.
Tip: If the app cannot find a device, check its pairing indicator and confirm that your phone is on a supported Wi-Fi band. Do not repeatedly reset it unless the instructions call for a reset.
Check: The device appears in the app with the correct name and room, and the app reports that it is online.
Step 5: Set permissions for family members
Invite family members through the app’s household or sharing controls. Give each person their own account when possible, and assign only the controls they need. For children, use the platform’s child or supervised account options and check whether voice purchasing, calling, camera viewing, or door control can be restricted. Explain which devices may record audio, video, or activity.
Tip: Keep account recovery and administrator access with a responsible adult. Remove access when a household member no longer needs it.
Check: Each invited person can use the intended controls, while restricted actions remain unavailable to accounts that should not have them.
Step 6: Create simple routines and safety limits
Set up only a few routines that are easy to understand, such as turning off shared lights at bedtime. Review the schedule, device list, and conditions before saving. Do not create routines that could disable safety equipment, unlock an entry, or leave a child without needed lighting or temperature control. Keep manual switches and controls usable.
Tip: Name routines by their result, such as “Turn off downstairs lights,” and tell everyone when they run.
Check: A routine runs at the intended time or trigger, and family members can still control the device manually.
Step 7: Review privacy and security settings
Open the app’s privacy and security settings. Turn off features the family does not need, such as voice recording history or remote camera access, where available. Check notification recipients, data-sharing options, software update settings, and account sign-in activity. Install available firmware updates through the official app, then confirm that the device reconnects.
Tip: Review camera fields of view and microphone settings with everyone in the household, especially before enabling access from outside the home.
Check: You know which devices can record or send alerts, who receives those alerts, and how to change the related settings.
Step 8: Test normal use and teach the household
Test each device from its app and from any physical control. Ask each family member to try the actions they will use, such as turning on a light or dismissing an alert. Test routines and notifications at a convenient time. Show everyone how to use manual controls if Wi-Fi or the app is unavailable, and explain whom to contact if a device behaves unexpectedly.
Tip: Test safety-related devices according to their maker’s instructions. Do not trigger a real emergency response just to test a connected alarm.
Check: Devices respond as expected, routines and alerts reach the right people, and family members can operate essential controls.
Common Mistakes to Avoid
- Buying devices before checking compatibility or hub requirements. — Check supported Wi-Fi bands, phone requirements, platform compatibility, and any required hub or subscription before purchase.
- Using one shared password for every family member. — Use separate accounts and invitations where supported, with a unique password and adult-controlled administrator access.
- Creating routines that cause confusion or affect safety. — Start with simple routines, tell the family when they run, and preserve manual controls and essential safety functions.
- Placing cameras or microphones without discussing privacy. — Agree on placement and recording settings with household members, and avoid private areas.
Troubleshooting
Problem: The app cannot find the device during setup.
Solution: Check that the device is powered and in pairing mode, move your phone closer, and confirm that the phone is on a supported Wi-Fi band. Follow the maker’s reset instructions only if the device still does not appear.
Problem: The device connects but frequently goes offline.
Solution: Move it closer to the router or a supported mesh access point, check for Wi-Fi dead spots, and restart the router and device using their instructions. Confirm that the router has not changed its network name or password.
Problem: A family member cannot see or control a device.
Solution: Check that the invitation was accepted, the person is signed into the invited account, and the device was shared with that account or household. Review restrictions on child or supervised accounts.
Problem: A routine runs at the wrong time or not at all.
Solution: Check its schedule, time zone, trigger conditions, and the device’s online status. Edit the routine, save it, and run a manual test when the family is available.
What Success Looks Like
Your setup is ready when each device appears online under a clear name, family members have appropriate access, routines and alerts behave as planned, and everyone knows how to use manual controls. Privacy settings should match the household’s choices, and essential safety functions should remain available if an app or internet connection fails.
Next Steps
Check for device and app updates periodically, review household access when needs change, and revisit camera, microphone, and notification settings with the family. Add another device only after the current setup works reliably and everyone understands how to use it. Keep product instructions and support details accessible in case a device needs to be reset or replaced.
Frequently Asked Questions
Do all smart home devices need internet access?
Many use the internet for remote control, voice assistants, alerts, or cloud features. Some functions may work locally when the internet is down, but this varies by device and platform. Check the product instructions and keep manual controls available.
Can children use smart home devices safely?
Children can use suitable controls when an adult sets appropriate account restrictions and explains how the devices work. Limit access to purchases, cameras, locks, and account settings as needed, and review those permissions as children get older.
Should the family use one smart home app?
Using a shared platform can make control and routines simpler, but devices may still require their own maker’s app for setup, updates, or special features. Confirm compatibility before buying and keep required apps on the adult-managed phone.
What should we do if Wi-Fi stops working?
Use the device’s physical controls and follow the router’s restart instructions. When the network returns, check the app for offline devices and reconnect them as directed. Do not rely on app-only controls for urgent needs.